Setup
Important
Upgrade
There is 2 ways
Use the update manager in addon preferences archiapck, or 3d view Create panel “About tab”
Request a download link by e-mail
Important
Download
Important
Important
Install the add-on on blender 4.3 +
Start blender, drag & drop downloaded archipack_xx.x.x.zip over blender’s ui.
Install the add-on on blender up to 4.2
Important
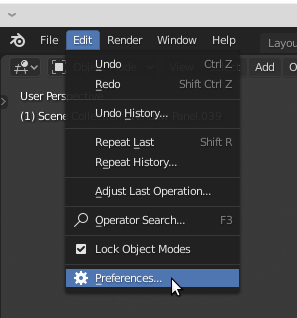
Open user preferences

Open preferences
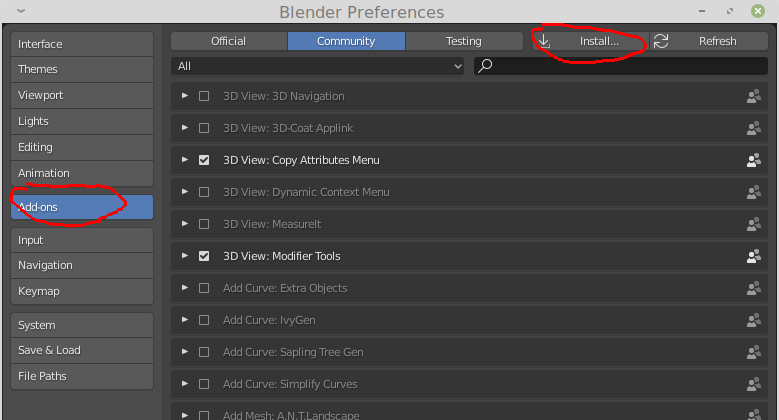
Press “Install from file”, select downloaded archipack_20.zip

Setup
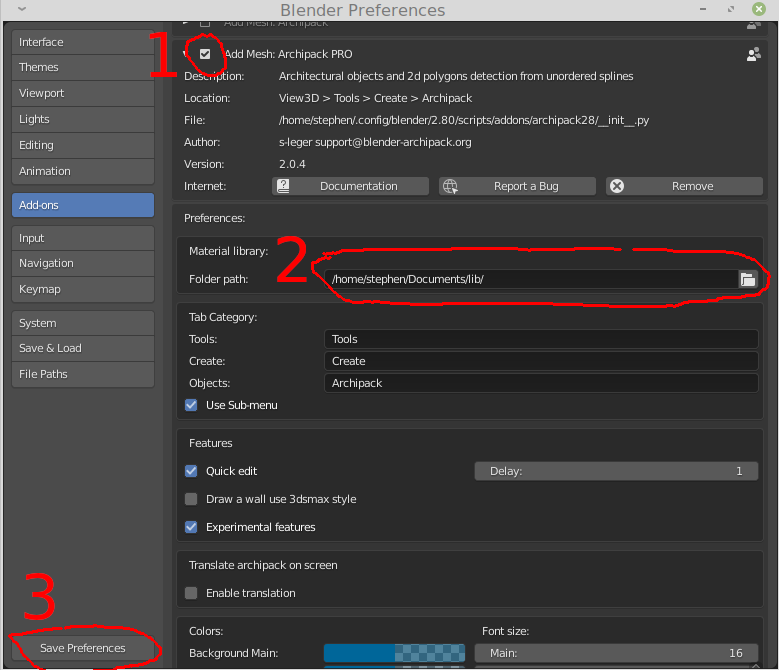
Activate the add-on

Activate
Tab Category
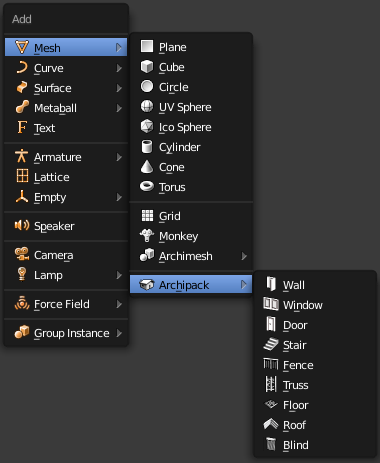
By default, Archipack’s panels are in the right panel of 3d view, under Archipack tab. Change tab name found in “Tab Category” in add-on preferences to move them under other tab.
Default material library
Along with the addon download link (e-mail), you’ll find a link for material library file. Download, create a folder and drop the file into that folder. In user preferences -> Add-ons -> Archpack PRO, add the full path to this folder into “Material library, Folder path”
